


In this tutorial, we will see how FastAPI can be deployed with Azure Webapps, what are some of the commonly faced issues, and their workarounds. For the example, we will be utilizing a simple fast API, that returns "Hello User" upon calling with the get method. But the conclusion of this blog will be discussing some tips if API is complex, or system requirement is huge.
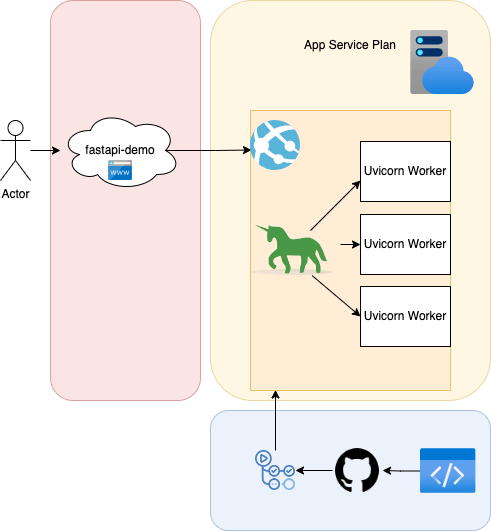
System Architecture
The user Calls the API i.e. makes a web request to Azure WebApp, this request is received by gunicorn WGSI server, which spawns FastAPI running with help of the Asyncronus Uvicorn Worker class. Each Uvicorn worker class runs a FastAPI application on a randomly selected process id (pid), while the Gunicorn handles request delegation on a process id that can be set to run on a certain port.
GitHub Actions act as a CI/CD tool to handle the automatic deployment. It can fetch changes made into a particular deployed branch, and automatically re-deploy. Learn more about CI/CD tools in this article. In simpler terms, and for this particular tutorial, GitHub action with Azure web app YAML, helps in automated deployments. And what's YAML now?
YAML or yet another markup language (YAML ain't markup Language) is a human-readable data serialization language for all programming languages, basically, it will be used for configuring our web app for deployment (As you dig deeper into deployments, automation, cloud or DevOps, YAML will be your best friend!)
A few requirements before starting:
A GitHub repository, with a branch you want to deploy (simply,
git checkout -b <>), I will be deploying branch called "demo"Installed Python, with Fast API library
What else..., an IDE maybe
Let's get started
Code & Localhost...
Step 1: Configuring venv & Libraries
Configure Venv using
python3 -m venv venvActivate venv using
source <path>/venv/bin/activateInstall Necessary Libraries
pip install fastapi, uvicorn, gunicorn
Step 2: Basic Code & Test
This file in this example is called main.py
import fastapi
from fastapi.middleware.cors import CORSMiddleware
import uvicorn
app = fastapi.FastAPI(
title="My API",
description="This is a very fancy project",
version="0.1.0",
openapi_url="/api/v0.1.1/openapi.json",
)
app.add_middleware(
CORSMiddleware,
allow_origins=["*"],
allow_credentials=True,
allow_methods=["*"],
allow_headers=["*"],
)
@app.get("/")
def read_root():
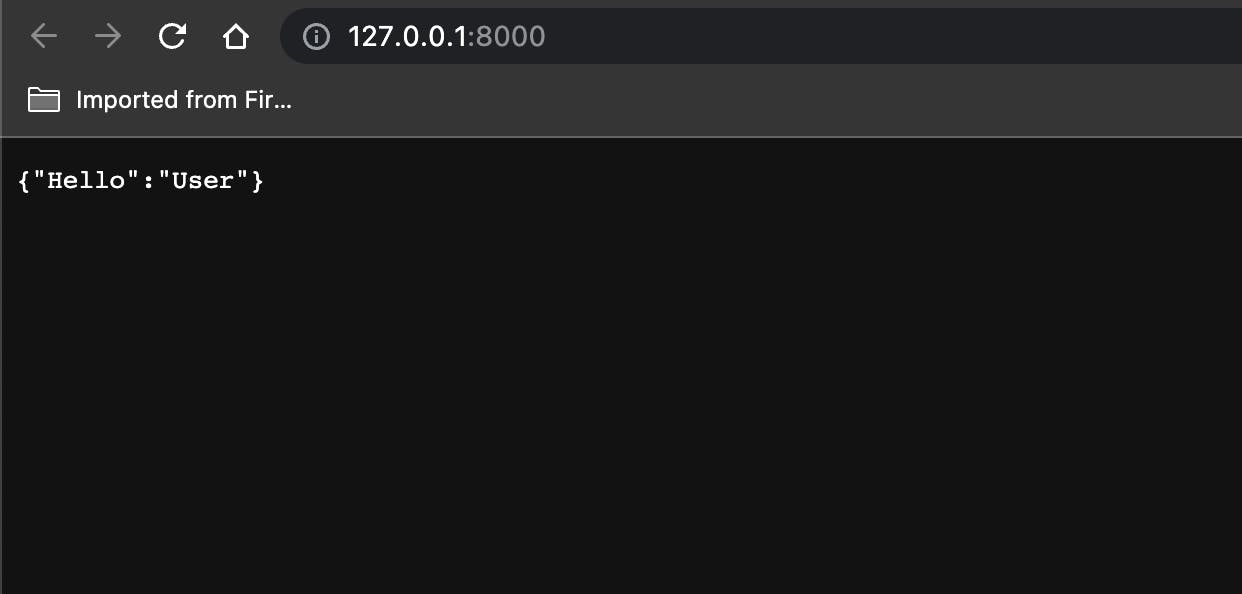
return {"Hello": "User"}
# This is to run in localhost, comment out while pushing to deploy on Azure
if __name__ == "__main__":
uvicorn.run(app, host="0.0.0.0", port = 8000, log_level='info')
A very simple FastAPI, Please note: Comment out last lines as mentioned below, before pushing changes onto GitHub or proceeding for deployment
if __name__ == "__main__":
    uvicorn.run(app, host="0.0.0.0", port = 8000, log_level='info')
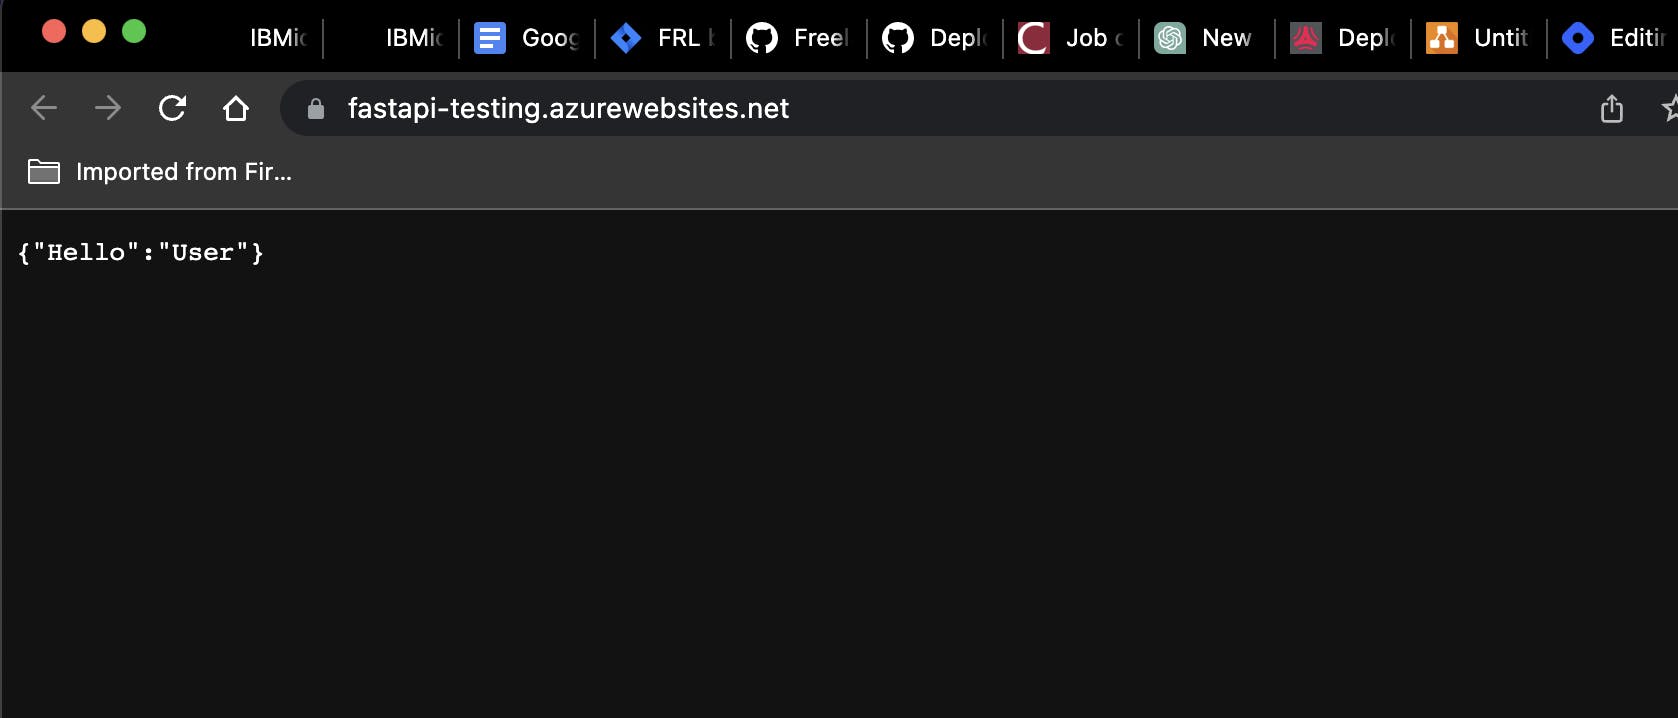
Verifying Output on Localhost:8000
- To run
main.pyscript useuvicorn main:app --reloadrest parameters are coded into the script...
Push changes on GitHub, please don't push any private info/ keys/ client secrets, use them in os.environor fetch from Azure Key Vault
Step 3: Deployment
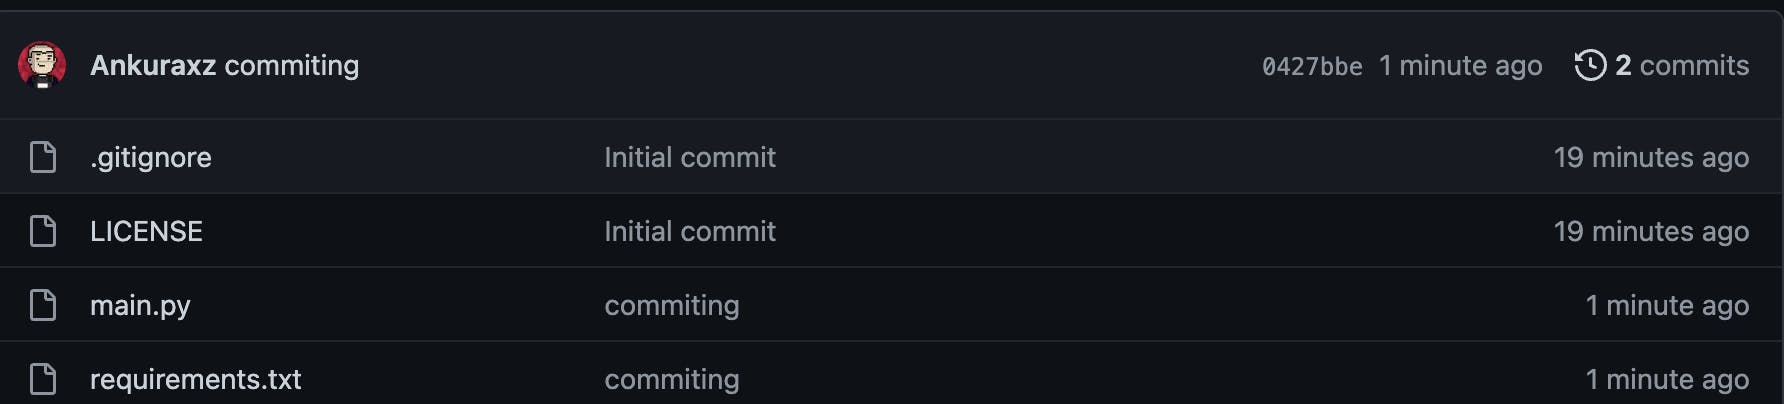
Save changes, and freeze requirements
pip freeze >requirements.txtCommit changes, and push to the desired branch with an innovative commit message like "committing"
For this example, I have a demo repository, where I pushed code in the main branch
- Moving onto deployments...
Configuring Azure
Set up a WebApp and WebApp service plan from Azure. From Create a resource > Create WebApp
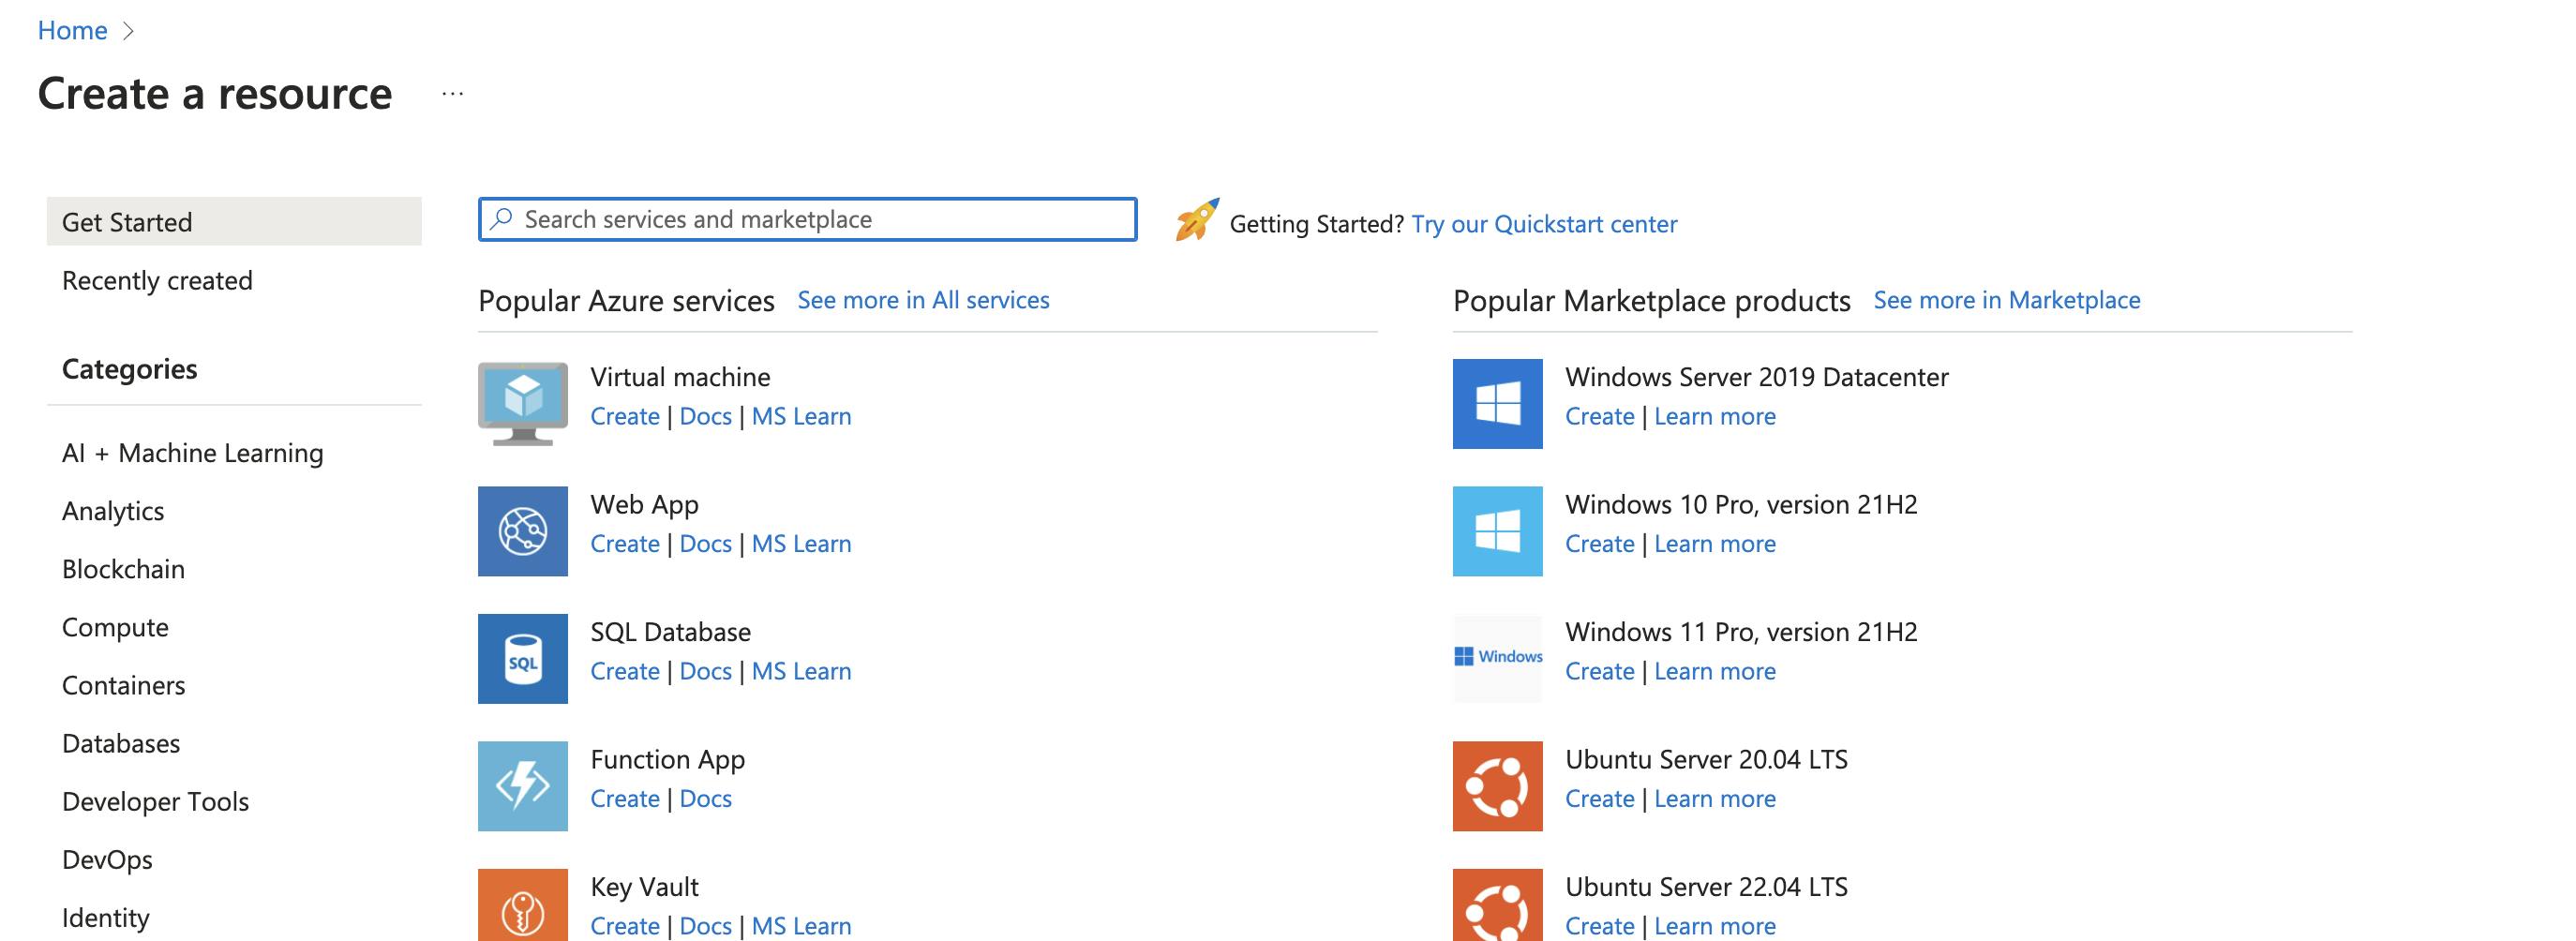
Configure the primary properties of the service plan and Web App, like location, OS (Linux in this case), Stack (Python 3.10 in this case), Subscription, pricing plan etc.

- The second step is to Add CI/CD details and disable them at this point in time
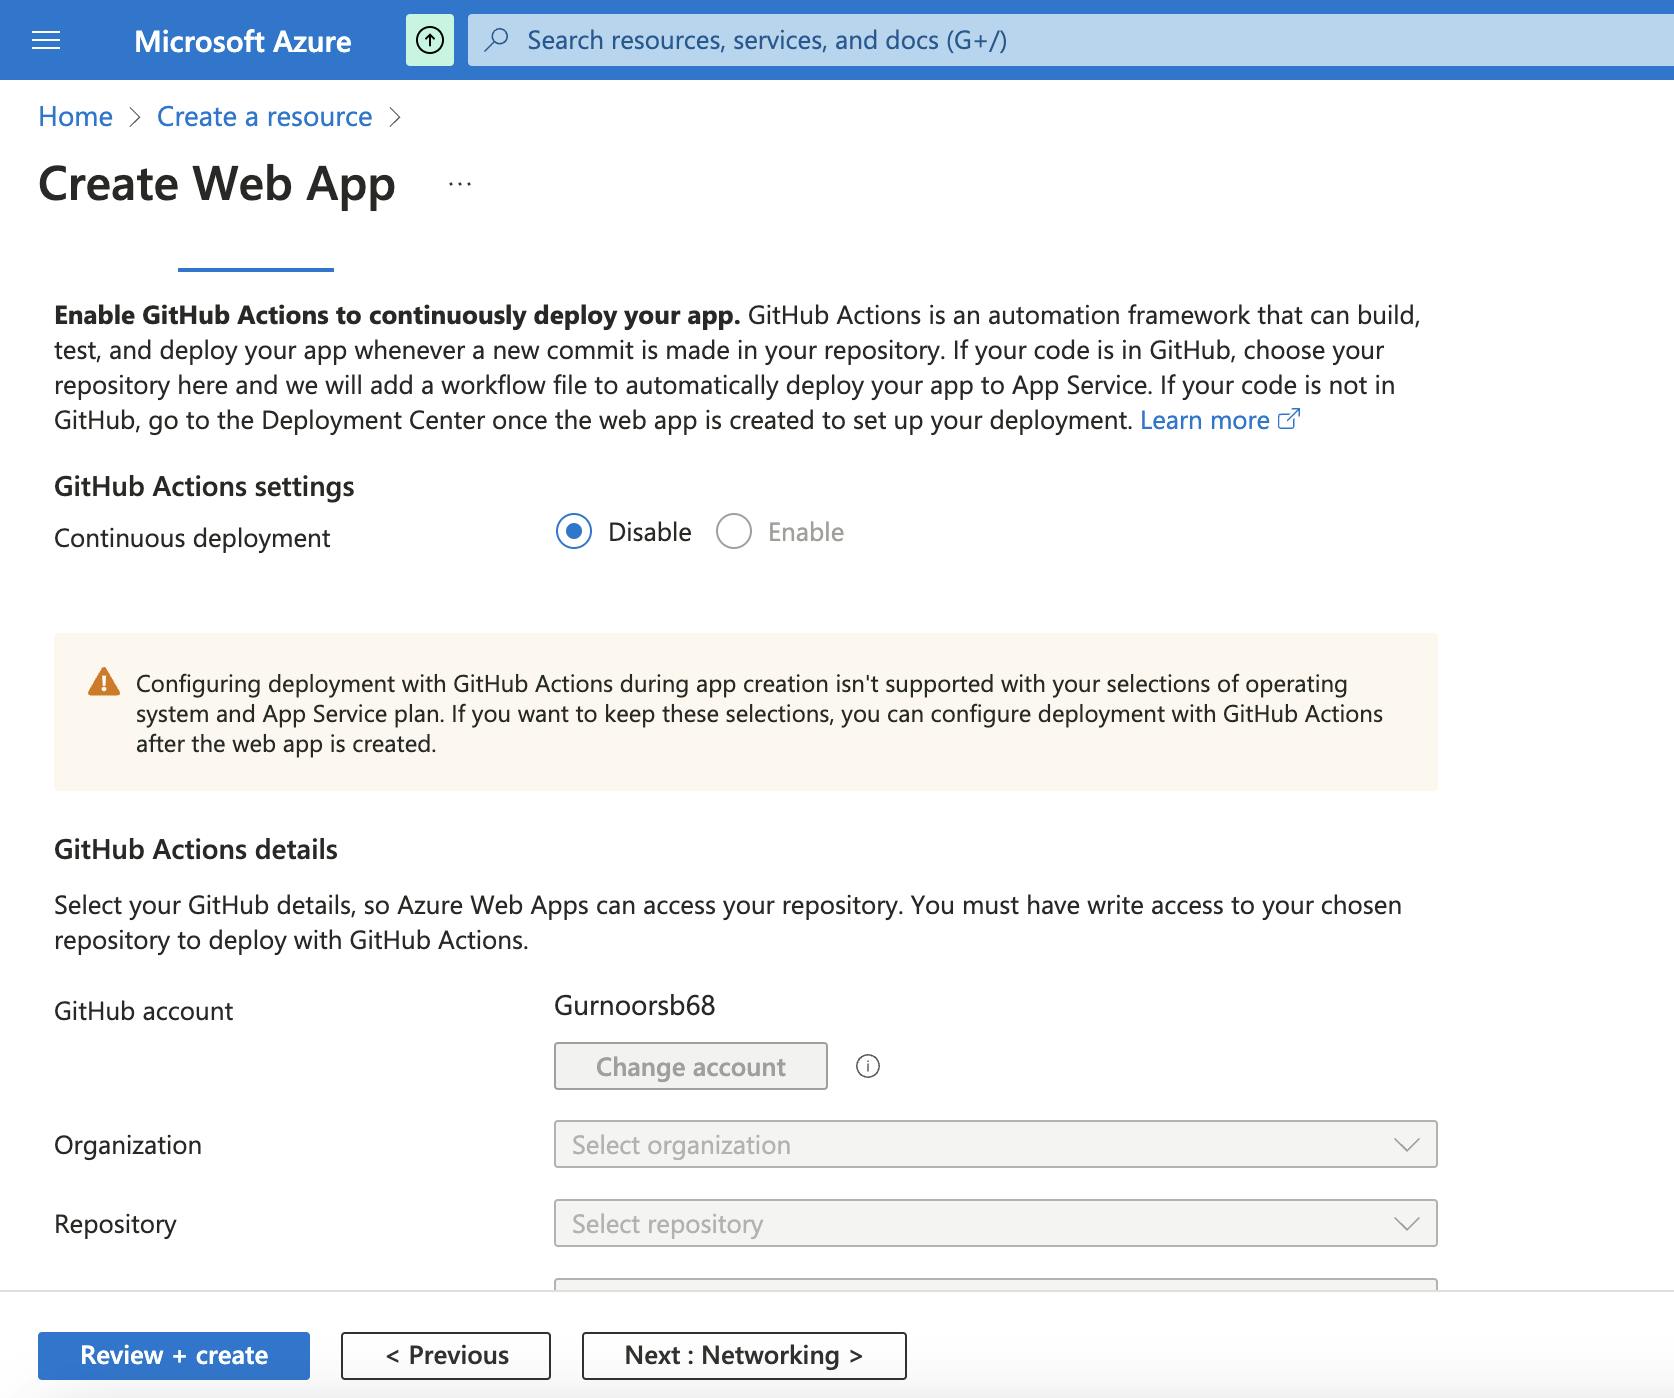
- Enable Public Access under networking, click i icon to know more

- Click Review + Create, and wait for the deployment to get successful.
Refer common Problem 1 to know about a common problem at this step with its possible resolution
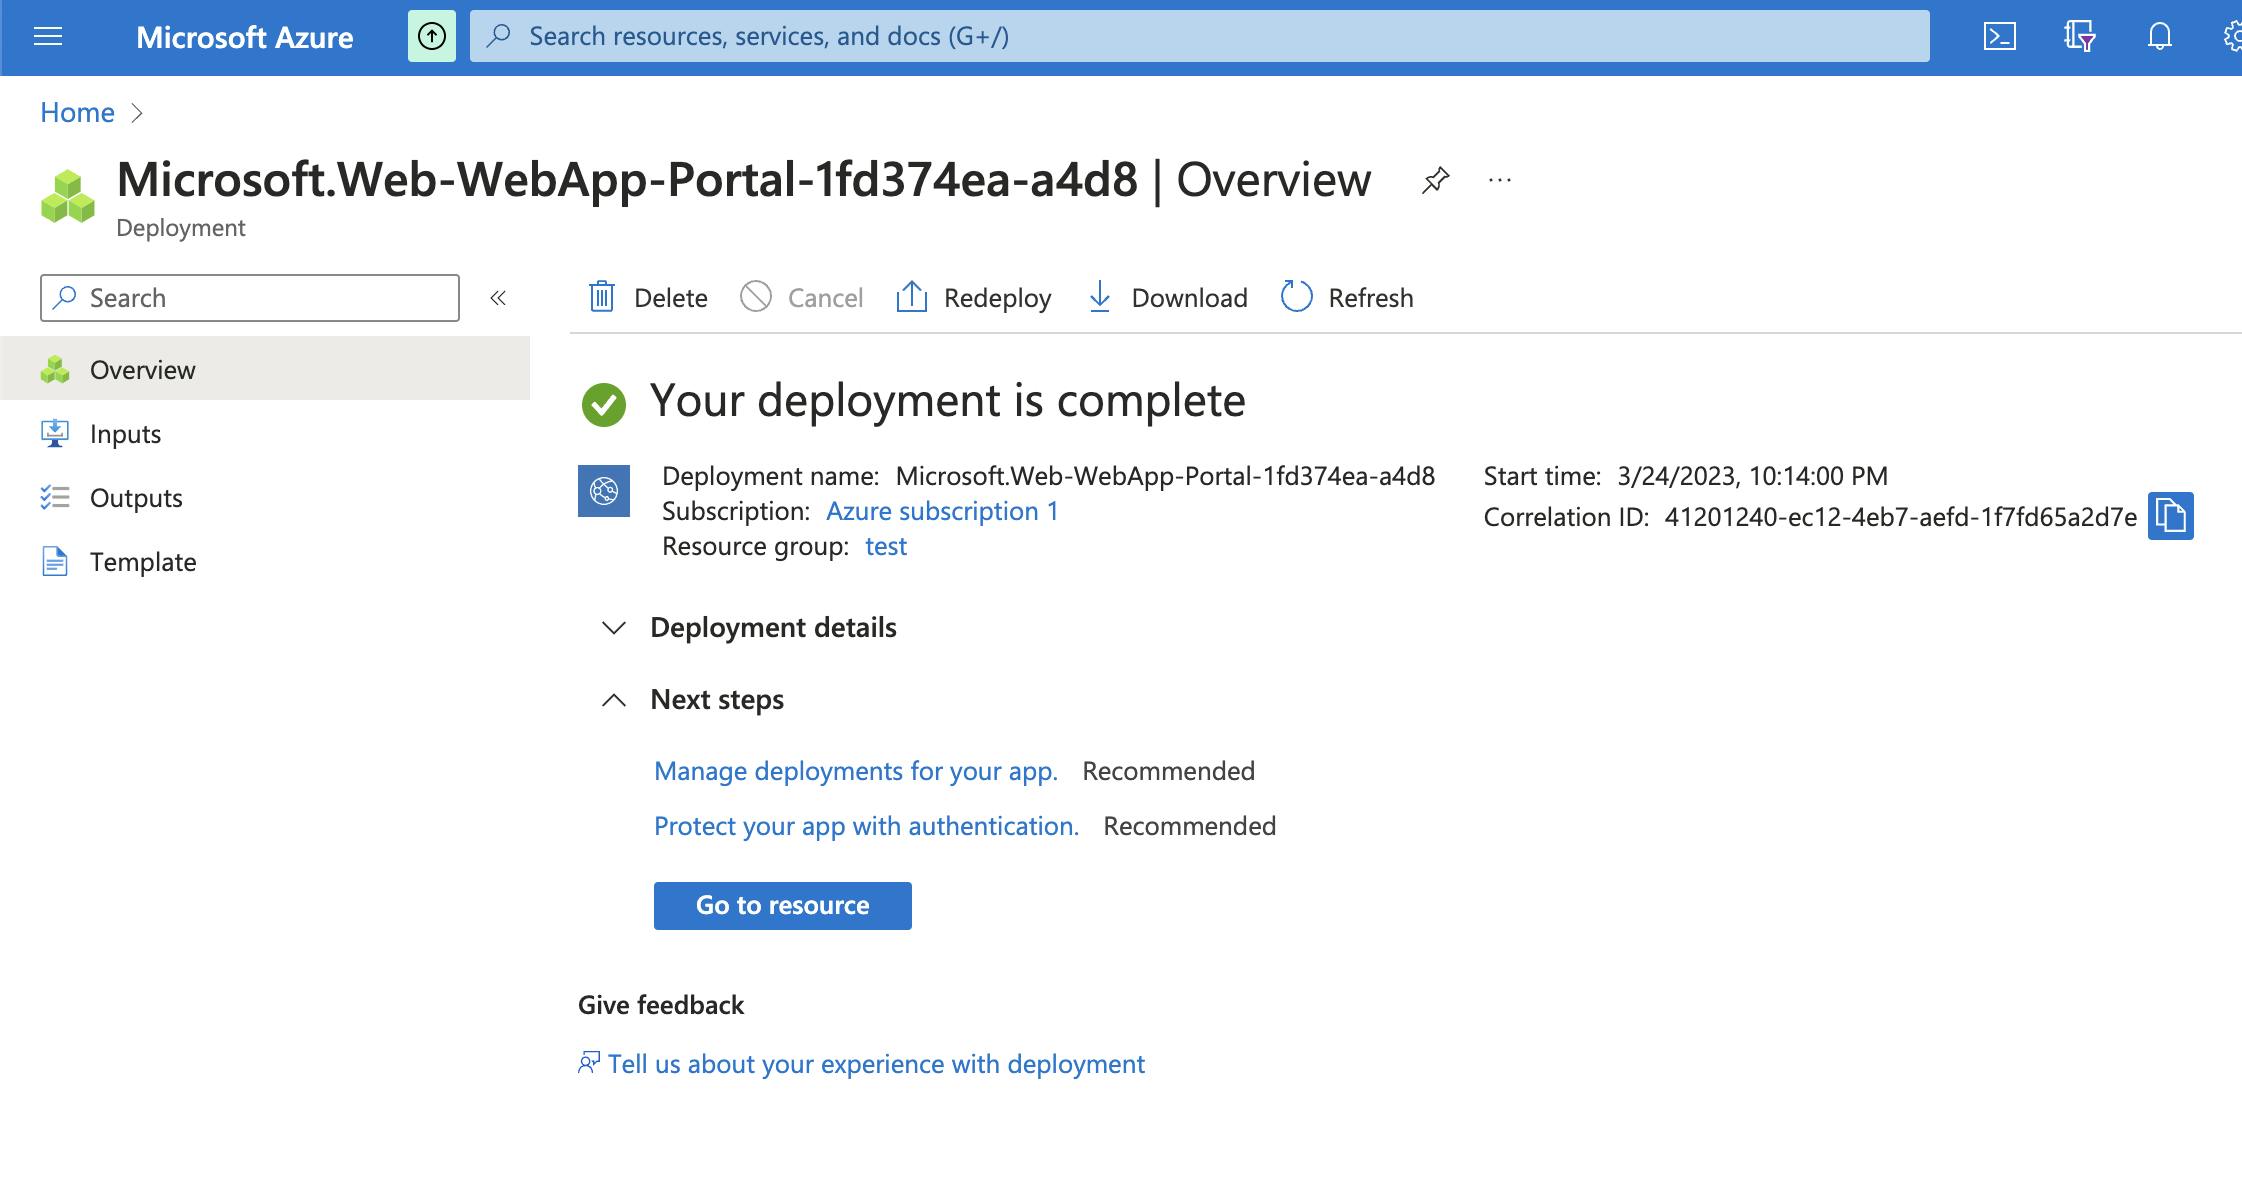
Go to resource > Configuration under Settings Tab> Application settings > Add
WEBSITES_PORT : <>port which you want to expose, in this example its 8000 (its generally 8000/ 3000).Read more about Websites_port and why we do it in common problem 2Add any environment variable (Key & Value) at this stage, for multiple values use
["val1","val2",...]

- Save after adding Application Settings, and click General settings

Edit General settings to mention startup script
gunicorn -w 4 -k uvicorn.workers.UvicornWorker main:appto use gunicorn with 4 uvicorn workersAlternatively in the root folder of your repository, where
main.pyis situated make another file namedgunicorn.py, with the following content (Benchmarking reference)import multiprocessing import os name = "Gunicorn config for FastAPI" accesslog = "/home/user/fastapi/gunicorn-access.log" errorlog = "/home/user/fastapi/gunicorn-error.log" bind = "0.0.0.0:8000" worker_class = "uvicorn.workers.UvicornWorker" workers = multiprocessing.cpu_count () * 2 + 1-> To use gunicorn.py, put this in the startup script
gunicorn --configgunicorn.pymain:appthis script calculates the number of workers required.-> Reference - https://stackoverflow.com/questions/66251679/deploy-fastapi-and-uvicorn-on-azure-app-service
Or simply use
uvicorn main:app --workers 4or equivalent like in localhost

Add Source as GitHub and Builder is GitHub Actions for this example
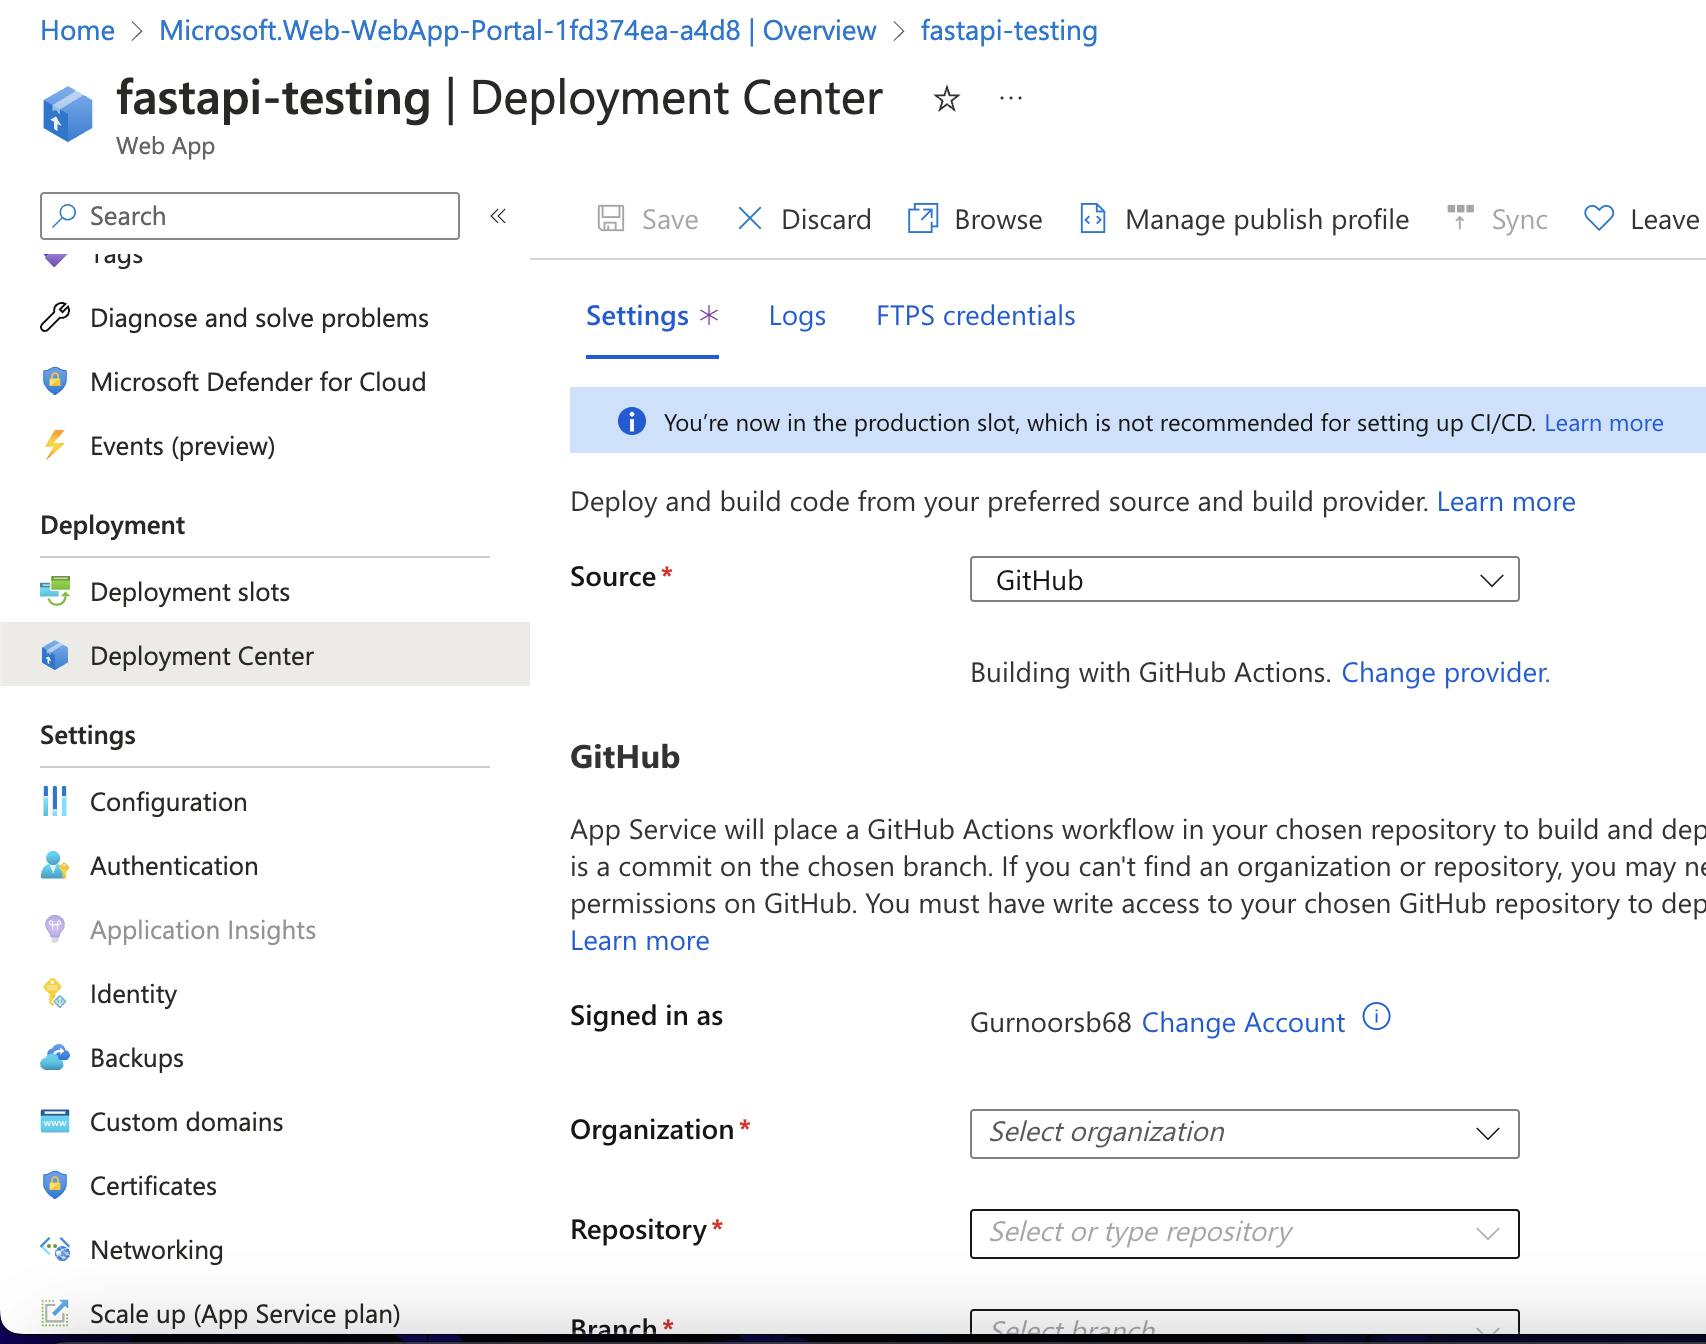
Add details of Organization, Repository & Branch
As soon as save is pressed, deployment starts & a yml file is generated in .github/workflows sub-repository, we will have a bit of a look on this file later.
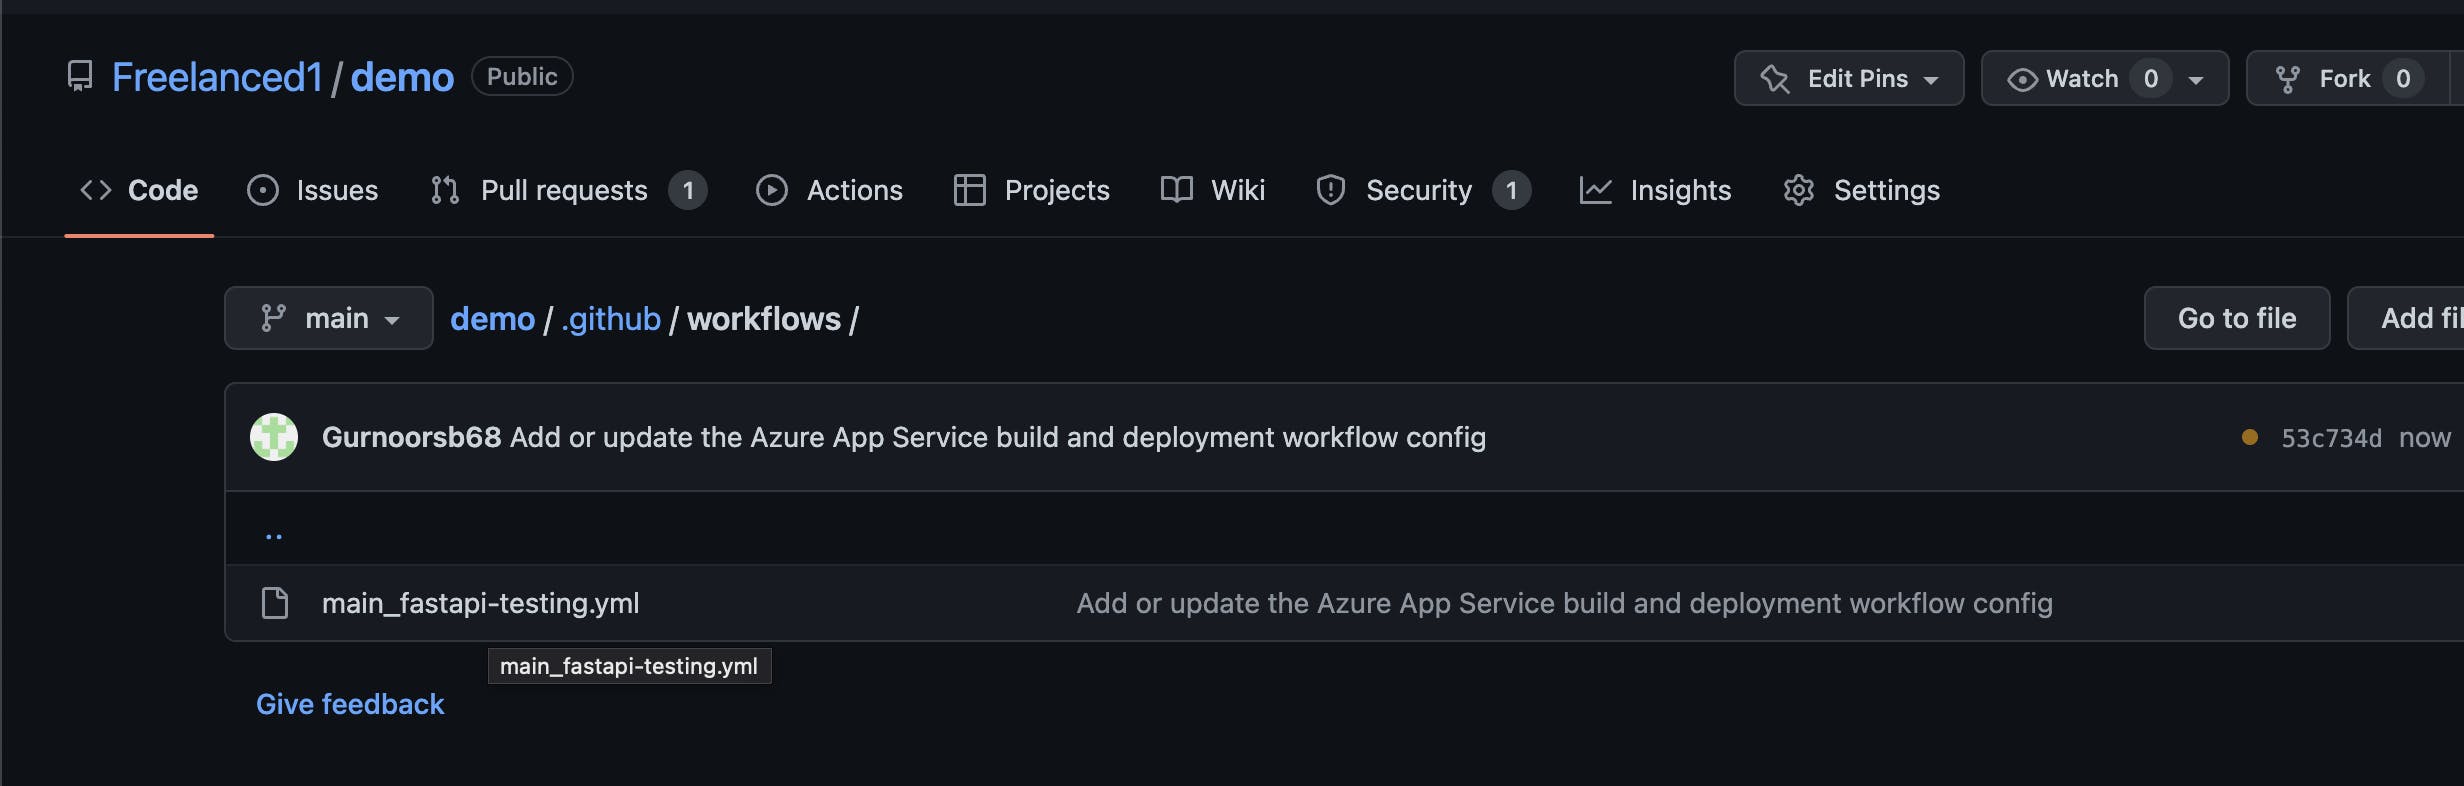

Wait for deployment to complete, and your app will be online and reachable.
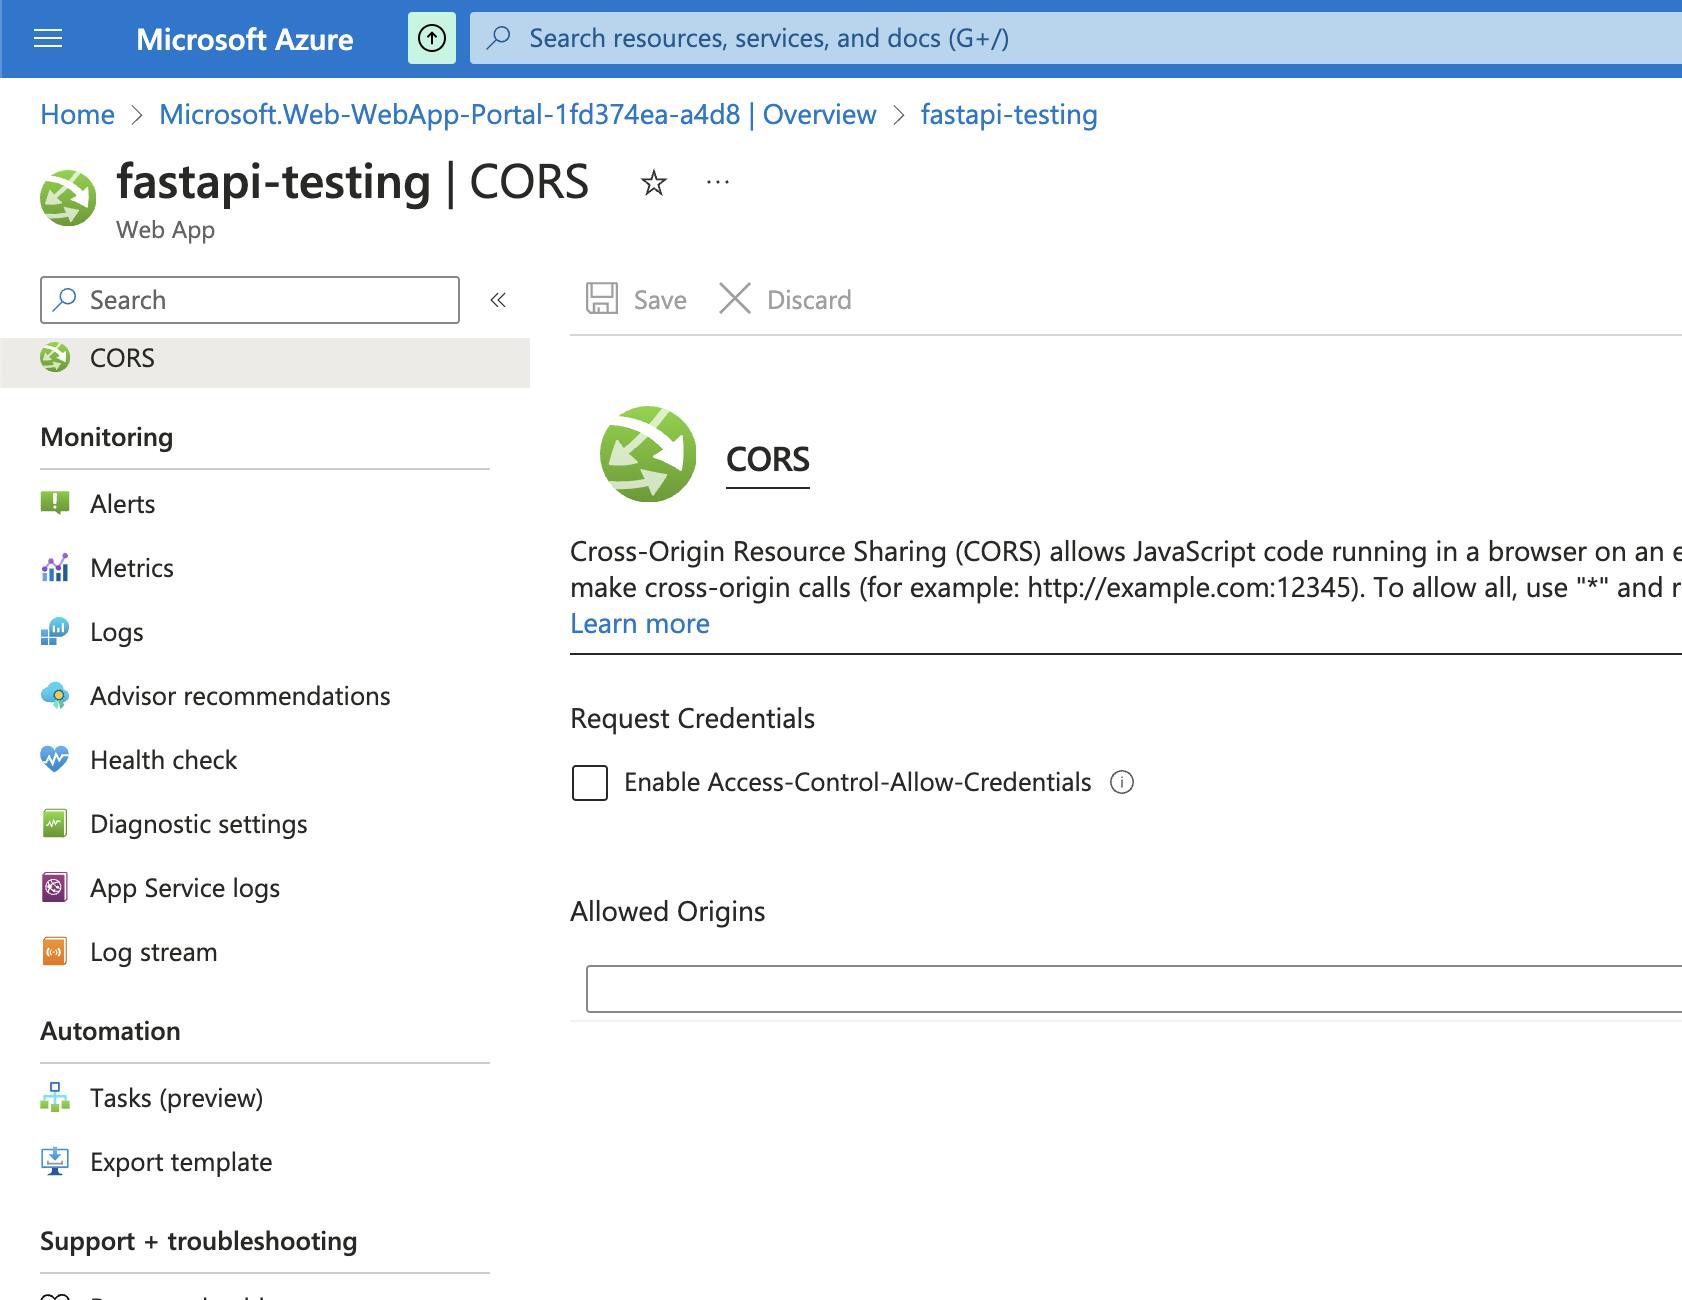
Enable CORS access by ticking the box, or by adding custom-allowed origins. Read more about CORS here
Voila, if everything is fine and good, App should be up.
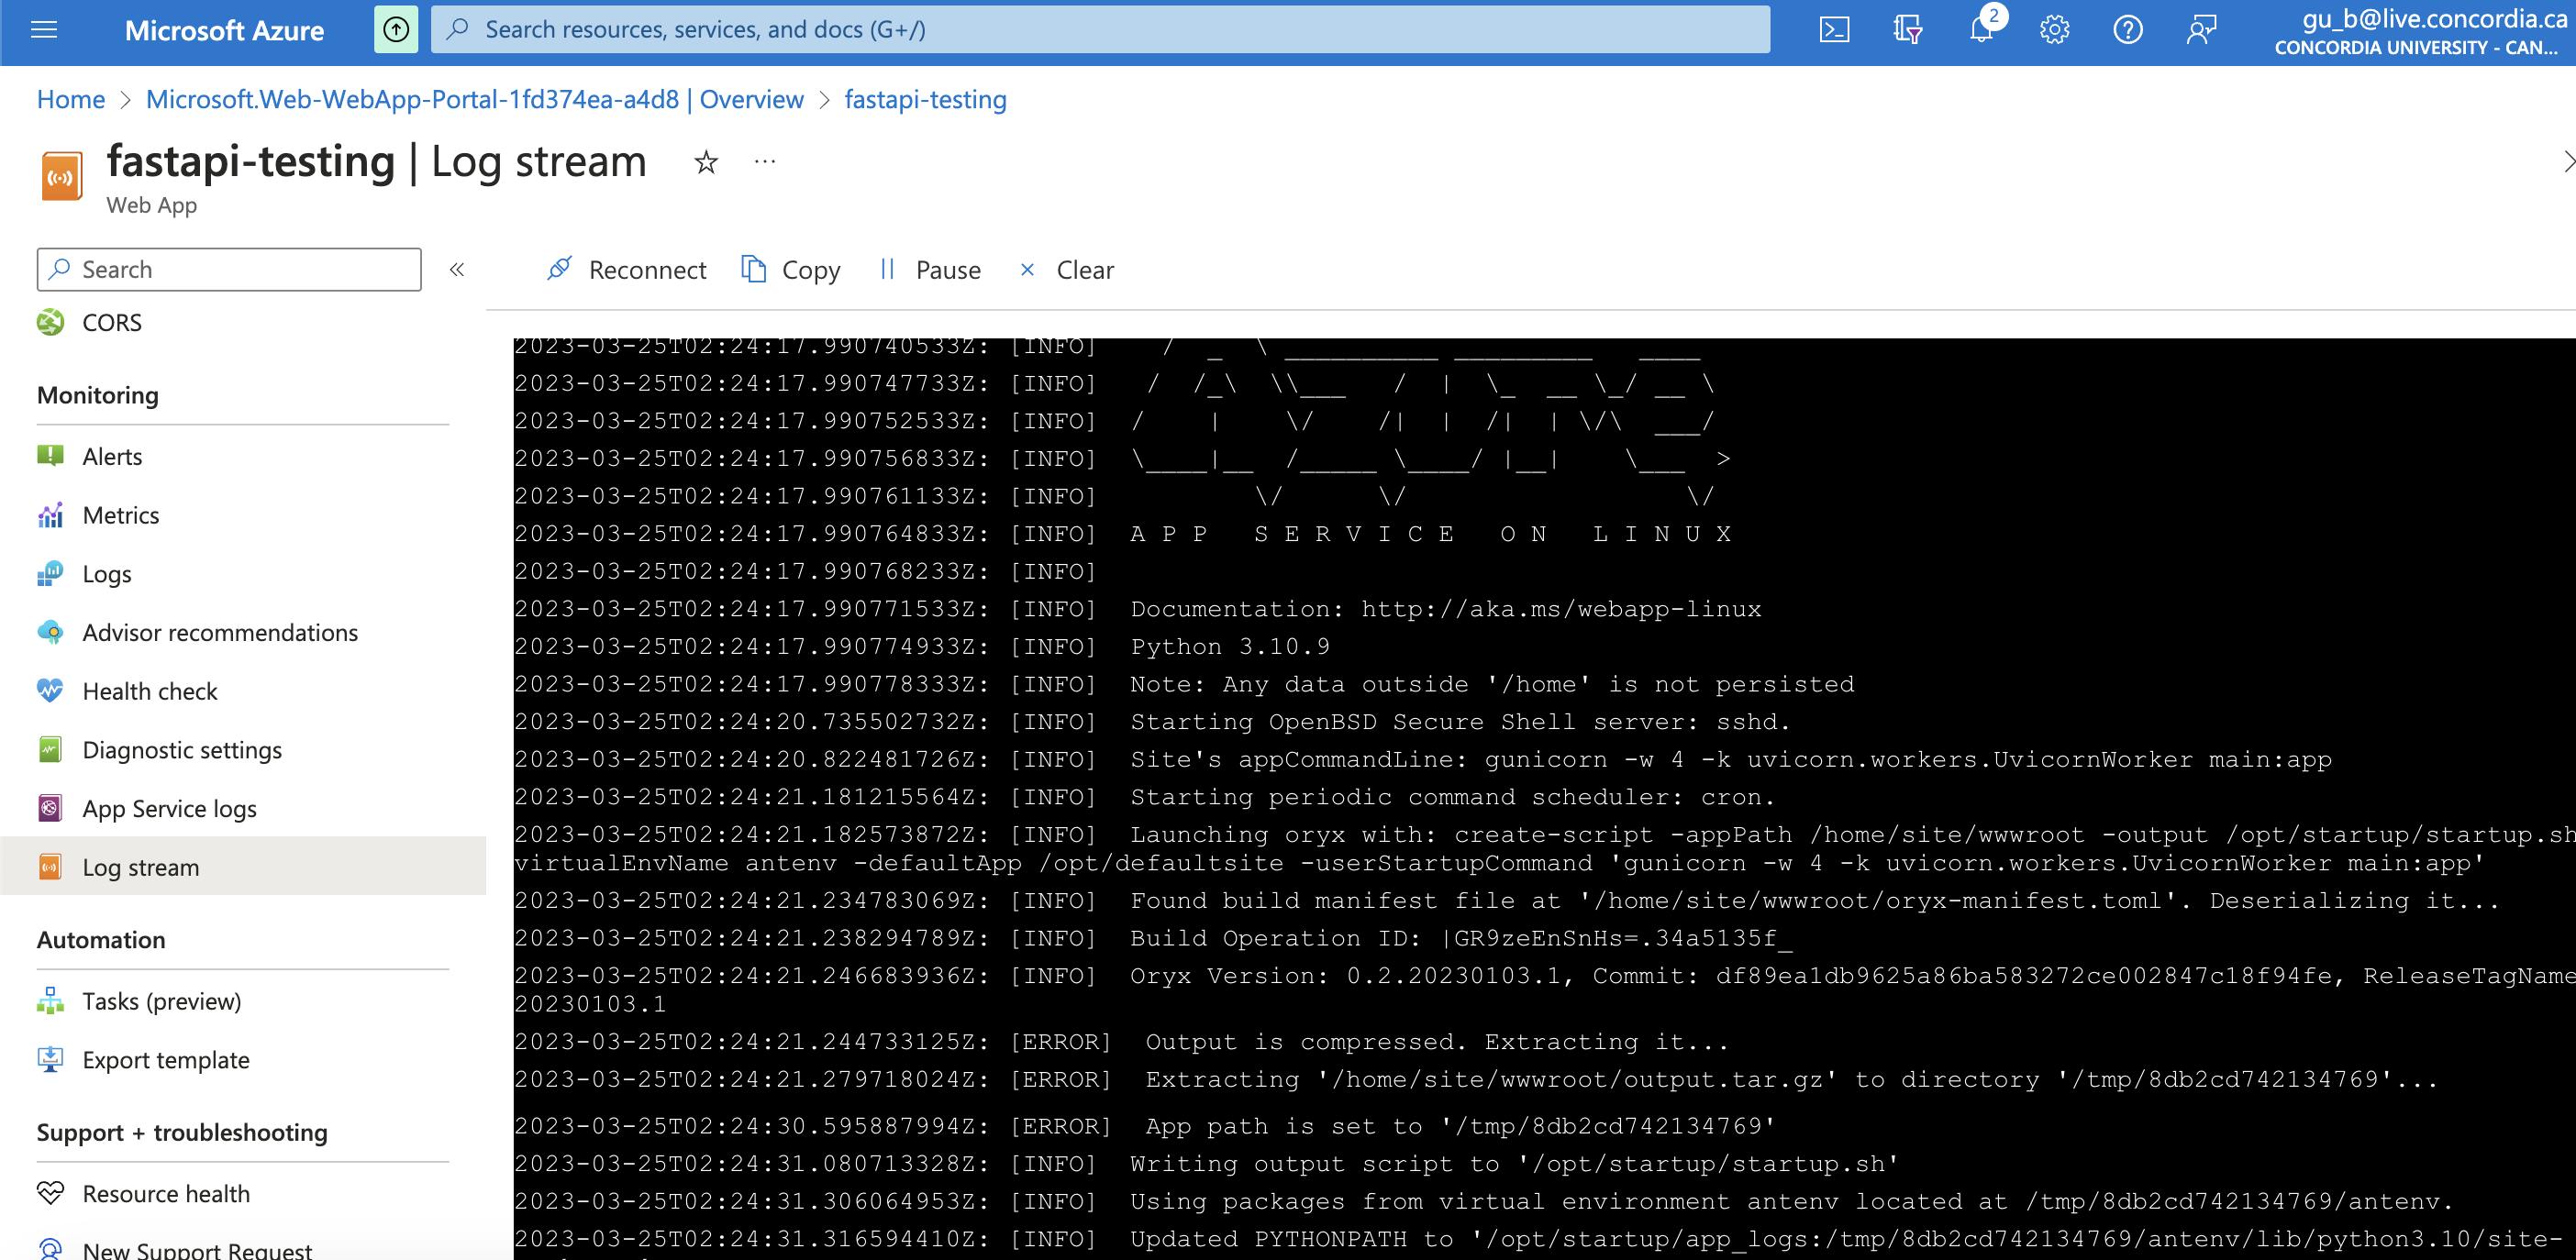
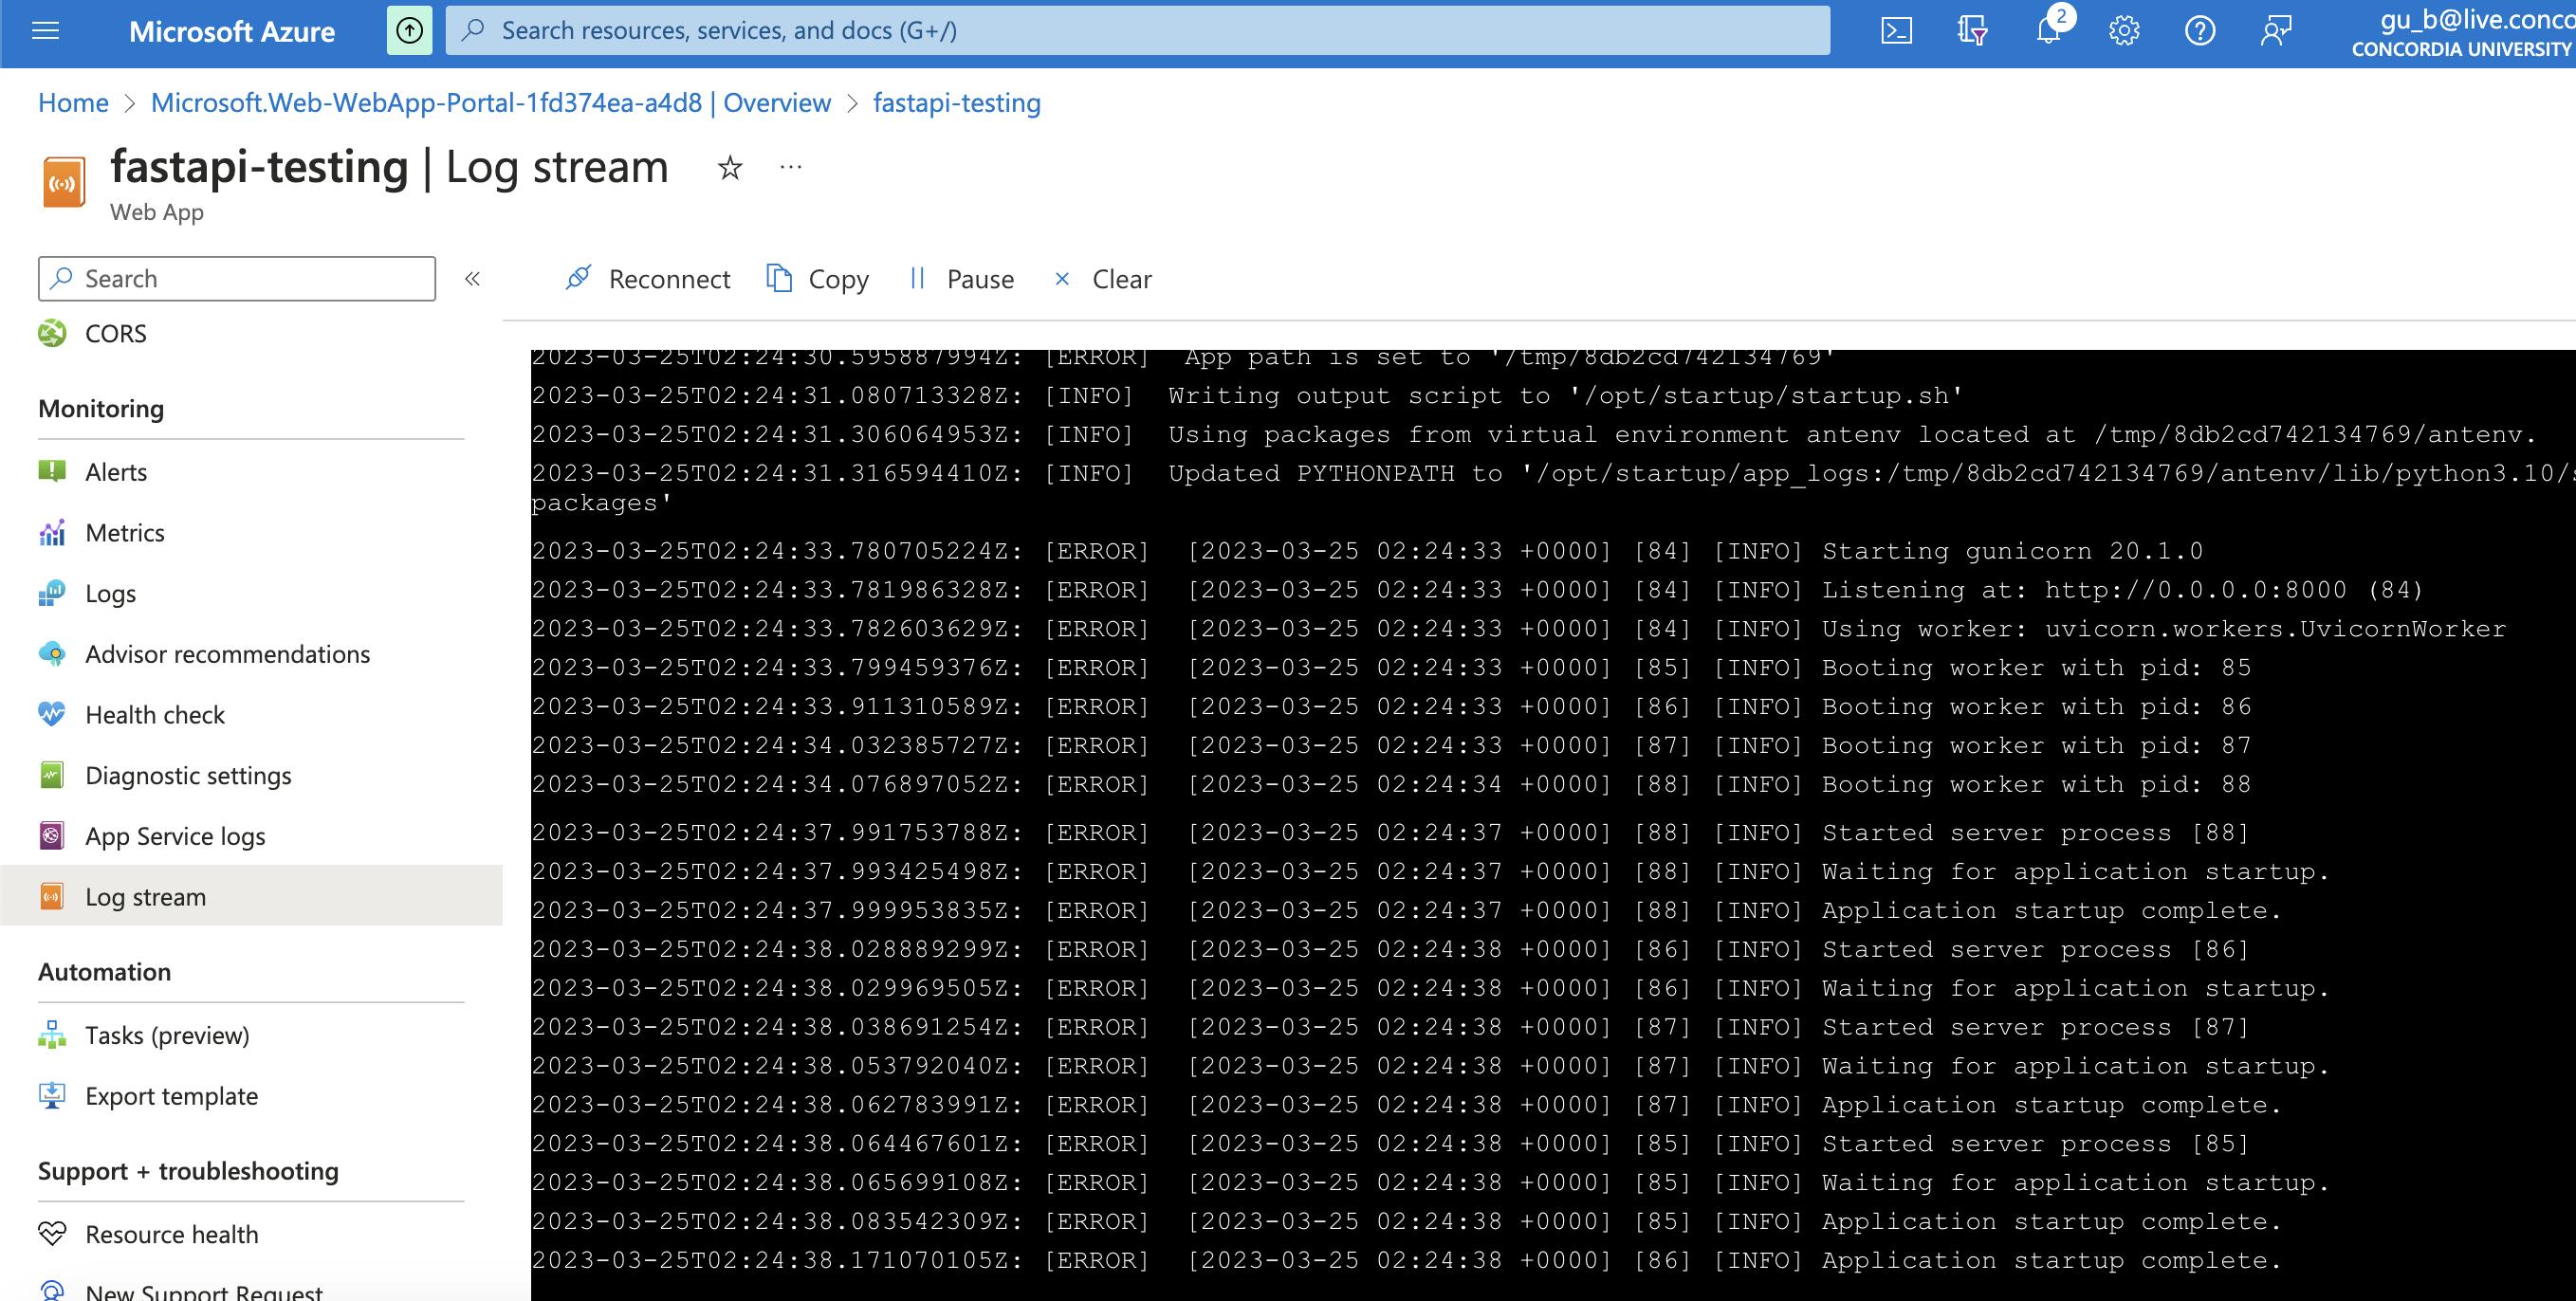
- Check logs to understand the working of Gunicorn and your application, this tool when configured well also helps to
YAML file.
# Docs for the Azure Web Apps Deploy action: https://github.com/Azure/webapps-deploy # More GitHub Actions for Azure: https://github.com/Azure/actions # More info on Python, GitHub Actions, and Azure App Service: https://aka.ms/python-webapps-actions name: Build and deploy Python app to Azure Web App - fastapi-testing on: push: branches: - main workflow_dispatch: jobs: build: runs-on: ubuntu-latest steps: - uses: actions/checkout@v2 - name: Set up Python version uses: actions/setup-python@v1 with: python-version: '3.10' - name: Create and start virtual environment run: | python -m venv venv source venv/bin/activate - name: Install dependencies run: pip install -r requirements.txt # Optional: Add step to run tests here (PyTest, Django test suites, etc.) - name: Upload artifact for deployment jobs uses: actions/upload-artifact@v2 with: name: python-app path: | . !venv/ deploy: runs-on: ubuntu-latest needs: build environment: name: 'Production' url: ${{ steps.deploy-to-webapp.outputs.webapp-url }} steps: - name: Download artifact from build job uses: actions/download-artifact@v2 with: name: python-app path: . - name: 'Deploy to Azure Web App' uses: azure/webapps-deploy@v2 id: deploy-to-webapp with: app-name: 'fastapi-testing' slot-name: 'Production' publish-profile: ${{ secrets.AZUREAPPSERVICE_PUBLISHPROFILE_4FBD8EBBEC0840999671265D0DCB23AE }}- As observable in the YAML file, we can check parameters like requirements.txt, venv params, app name, target branch, deployment triggering action etc.
Common Errors & Issues
Deployment issue with Azure in final step - Error
azure web app deployment failed message": "Cannot find User with name ...or
"ErrorEntity": { "Code": "NotFound", "Message": "Cannot find user.", "ExtendedCode": "09004", "MessageTemplate": "Cannot find user.", "Parameters": [], "InnerErrors": null
Resolution - Try the following
-> Create a New App service plan
-> Wait for some time before redeploying
-> Related Stackoverflow conversation
Port Related Issue post-deployment during startup (Observable in stream logs)
Azure Web App on Linux: "Error: Container didn't respond to HTTP pings on port: 8080
Resolution - Try the following (StackOverflow)
-> Expose Port in Dockerfile, if you are using Dockerfile
-> Create a key WEBSITES_PORT in the application setting, along with needed value like 8000 or 3000
-> A final workaround is to remove venv from yml file ( Entire field where venv is created and activated)
Issue Related to Haltserver due to gunicorn
gunicorn.errors.HaltServer: <HaltServer 'Worker failed to boot.' 3> djangoResolution - Try the following (Stackoverflow)
-> Refer StackOverflow comments for possible resolutions
Issue Related to SCM or Zip
az webapp deployment source config-zip does not respect existing SCM_DO_BUILD_DURING_DEPLOYMENTResolution - Try the following (Stackoverflow)
-> Set the value of
SCM_DO_BUILD_DURING_DEPLOYMENTastruein application settingsIssue Related to ZIP
`deployment Failed with Error: Package deployment using ZIP Deploy failed. Refer logs for more details`
Resolution - Try Following (Stackoverflow)
-> Set value of `WEBSITE_RUN_FROM_PACKAGE` as 1
Issue Related to Uvicorn or Gunicorn
FastAPI: ModuleNotFoundError: No module named 'uvicorn'Resolution - Try the following (Stackoverflow)
-> Refer StackOverflow comments for possible resolutions
-> Retry deployment after disconnection and reconnecting GitHub.